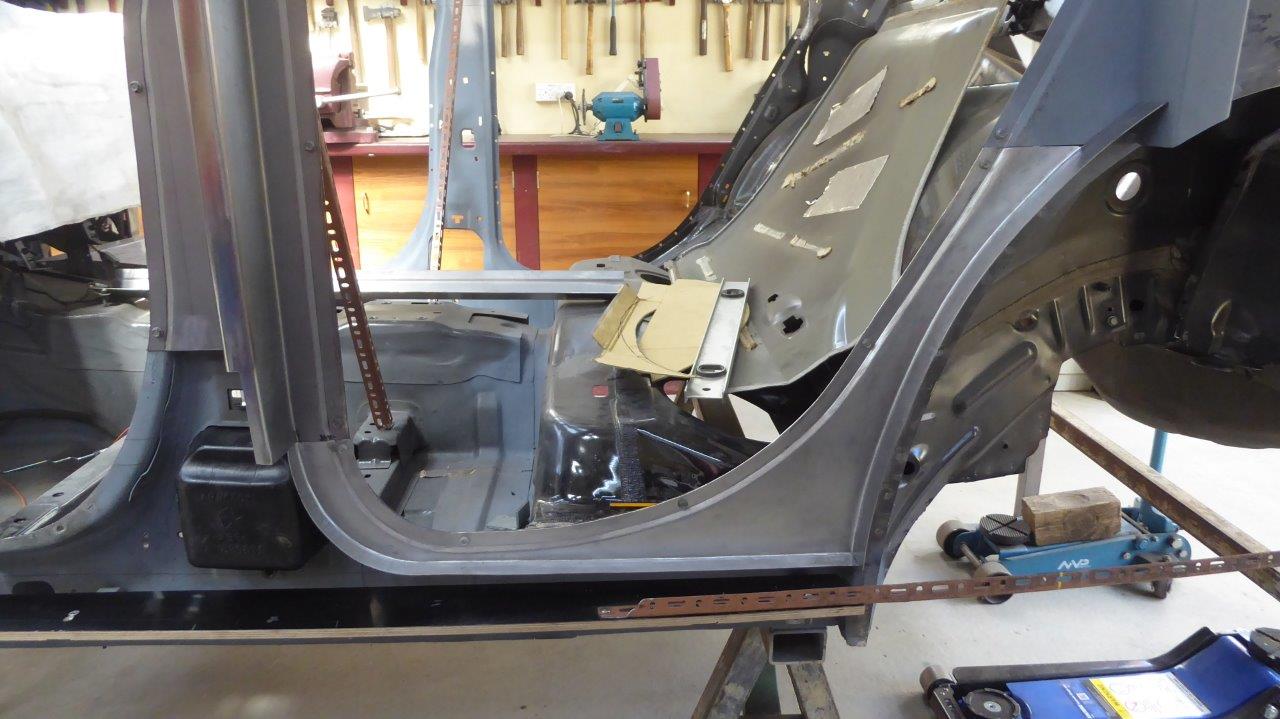
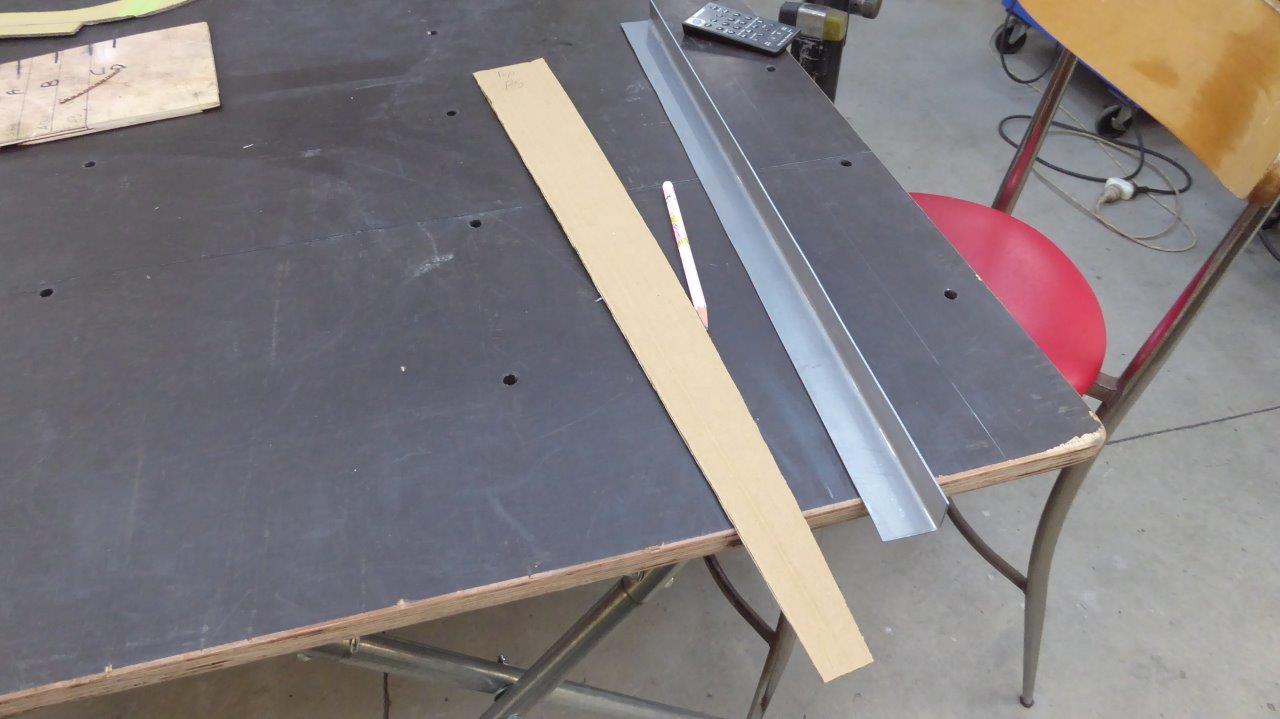
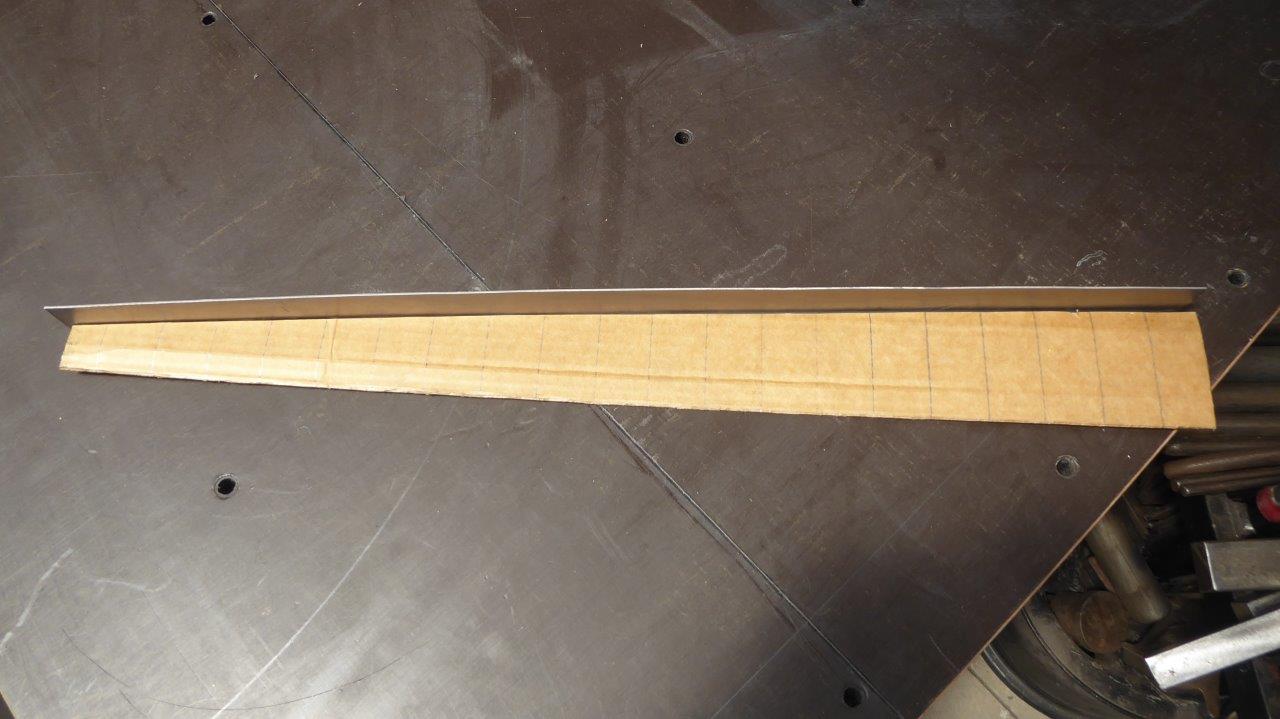
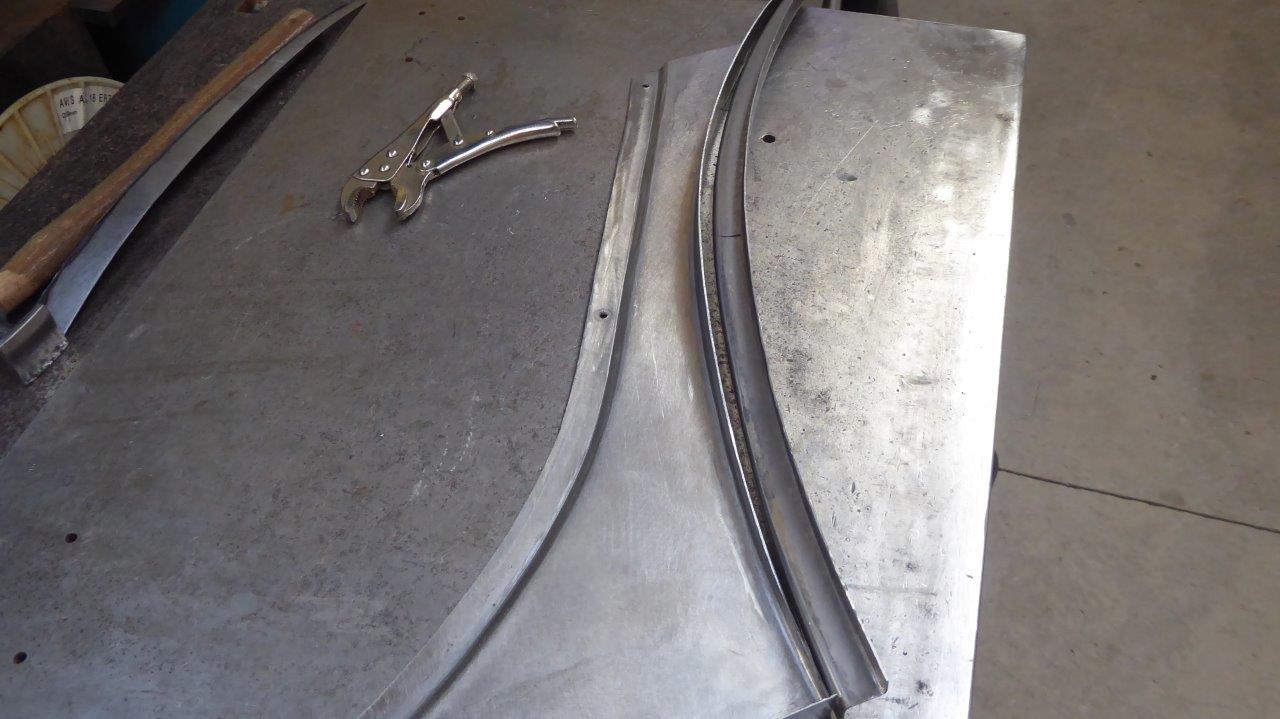
The next part of the inner skin I am going to make is what joins the B and C pillars together along the bottom. I had to work out the exact shape that the rear guard/fender will be and its position in the wheel well. Otherwise the wheel will not be centred in the opening once completed. Also how high the door sill is going to be off the top of the chassis rail as that determined the thickness of it later on. Once that was all worked out I made a template and then added the width of the flanges that will be added onto later on.
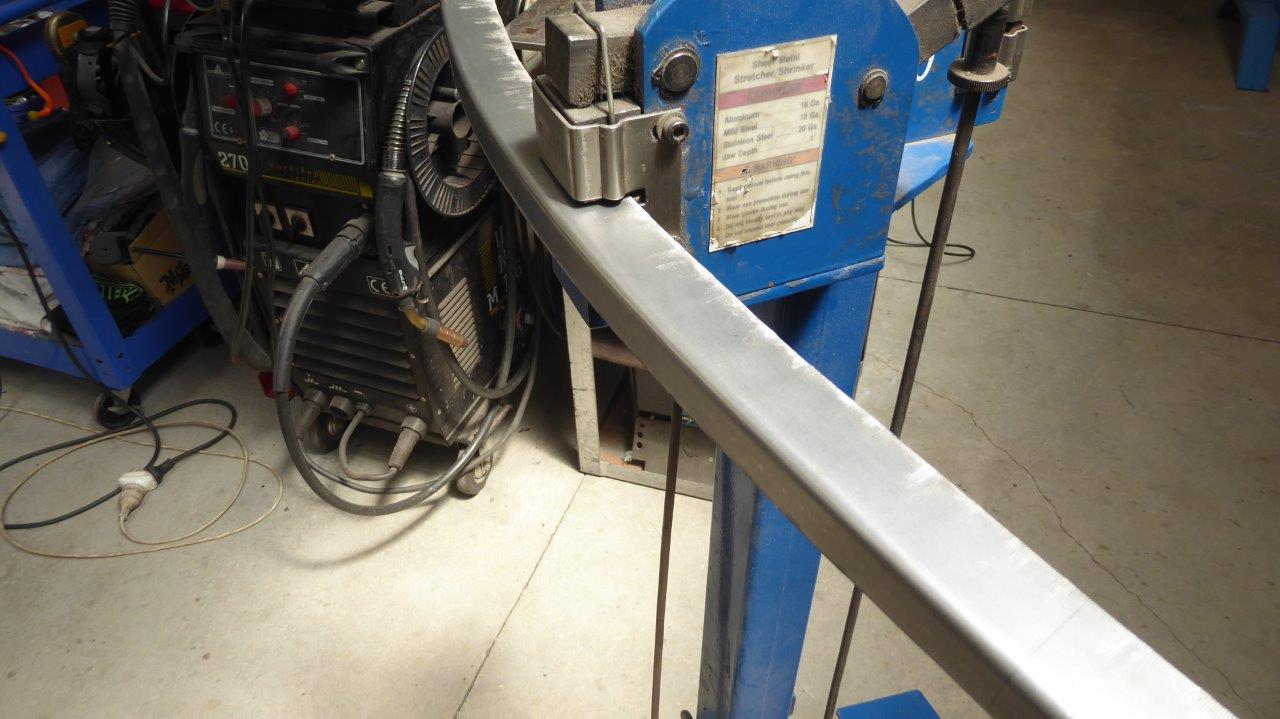
I thought I would try tipping all the flanges and make it without joins. I knew it was going to need a lot of shrinking and stretching depending on the direction of the curve. Can clearly see the tight outside radius already has excess material and will need a lot of shrinking. The inside radius needs stretching to get it to sit flat.
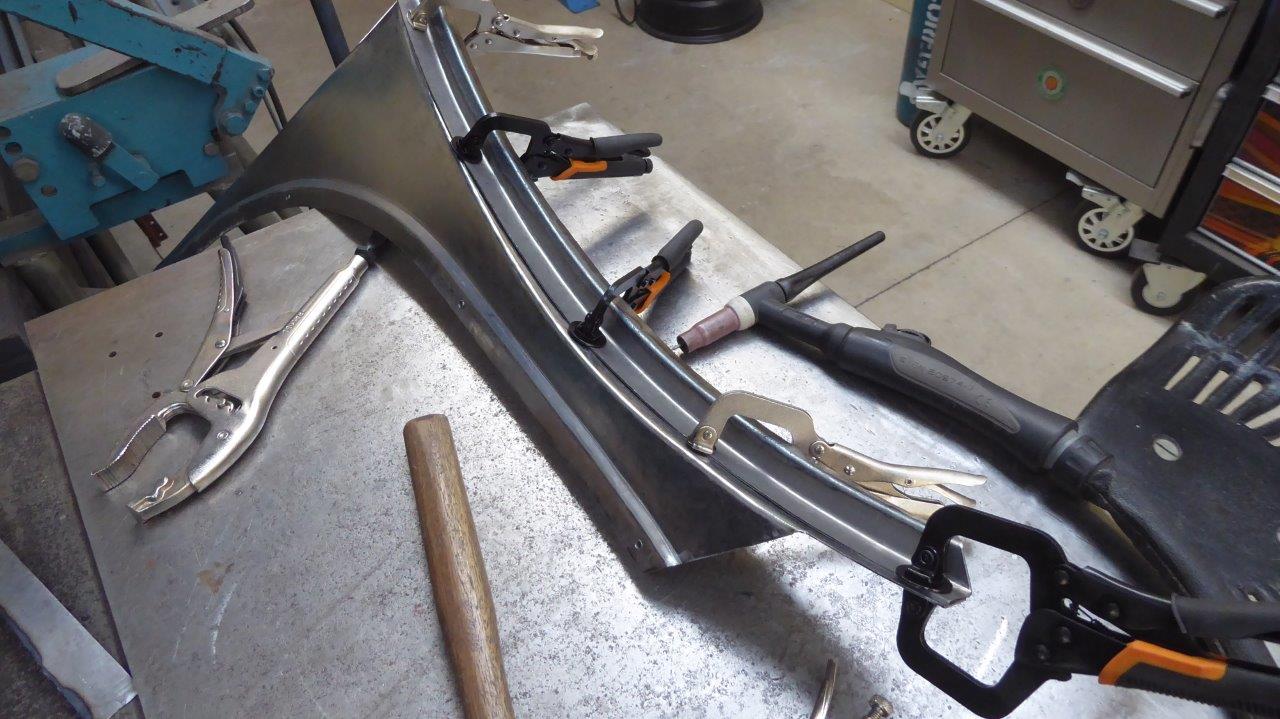
I did the shrinking and stretching as needed to get it flat again to this point and had to find a way to get more leverage to help tip the flange. So used some panel clamps to help and would just move them around to keep them in front of the wheel.
Using the clamps really helped and am at the maximum I can get with this type of tipping wheel. The rest will be done over a stake or hand dolly, shrinking and stretching the flange as needed to keep it flat as well.
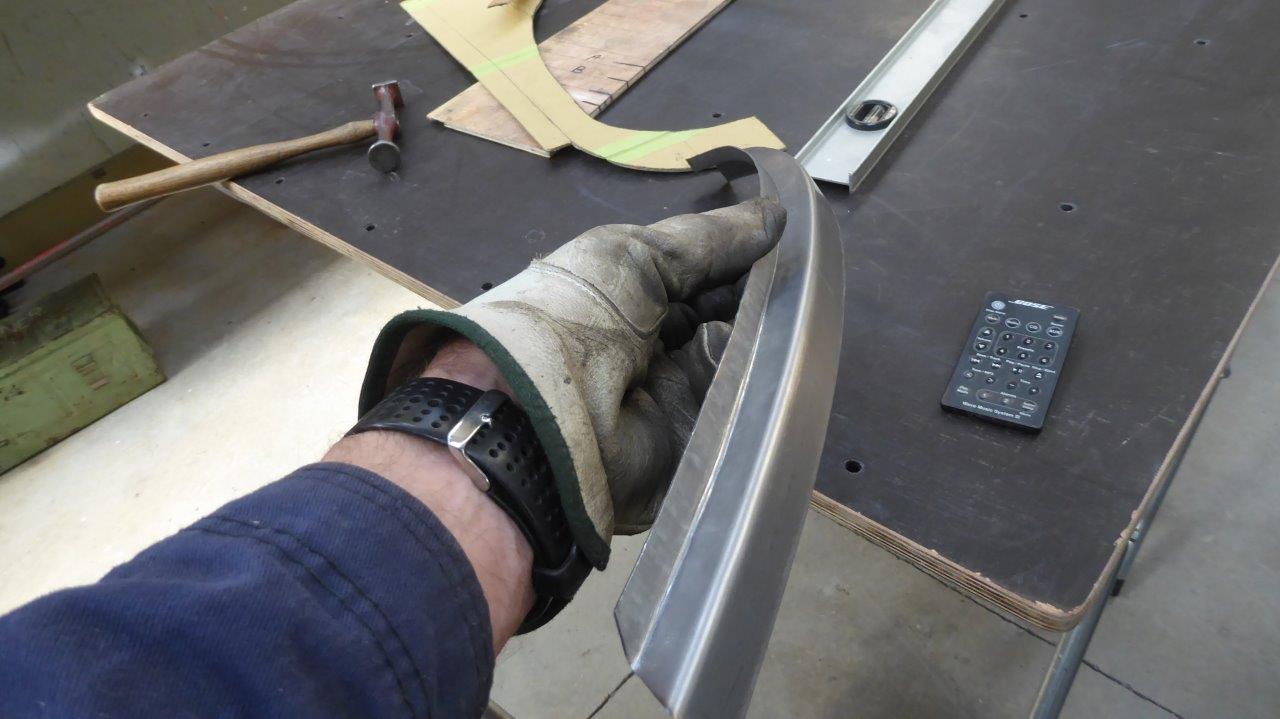
It all worked out in the end, but the tighter radius I wont do like this for the other side. I will weld that piece in as it will allow me the just use the folder for the bottom flange.
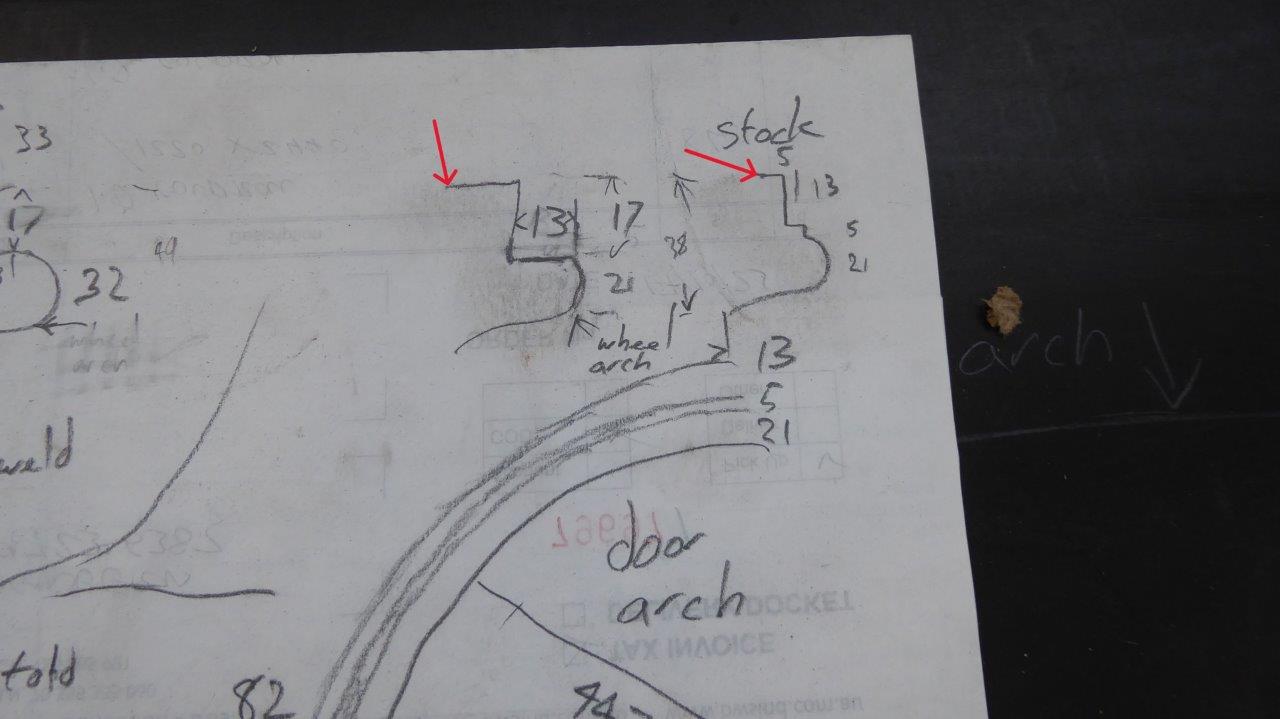
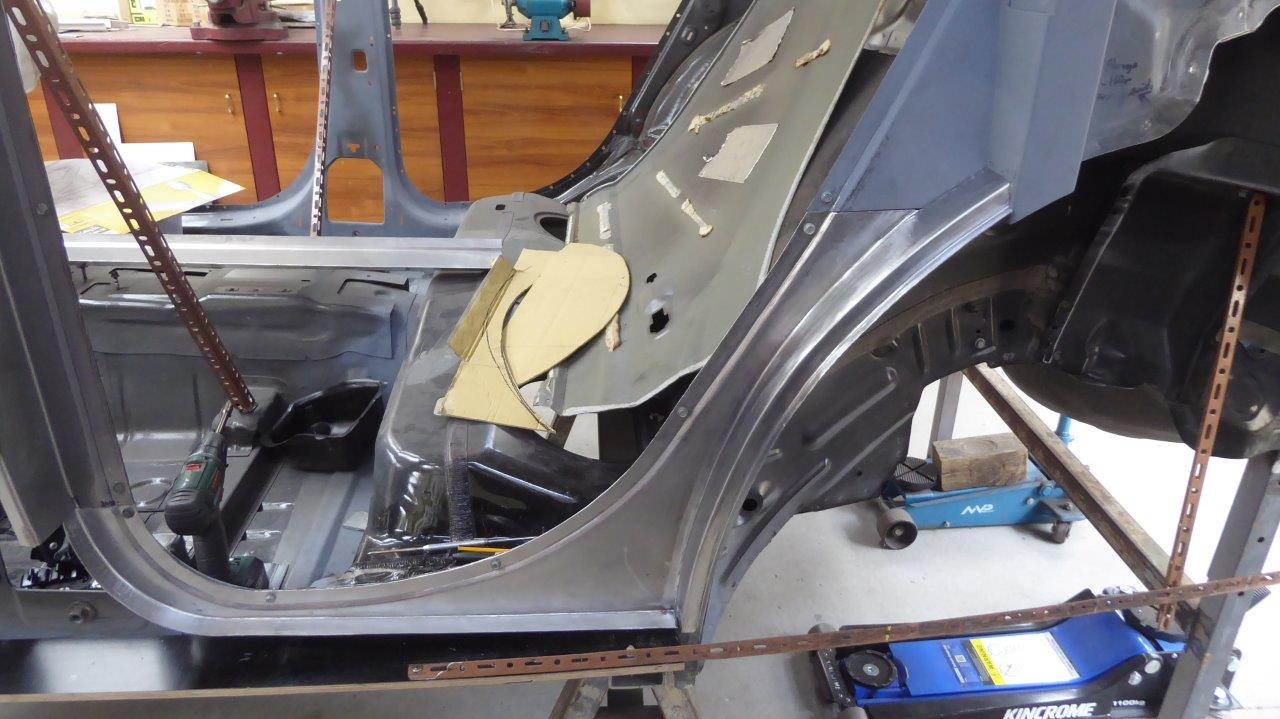
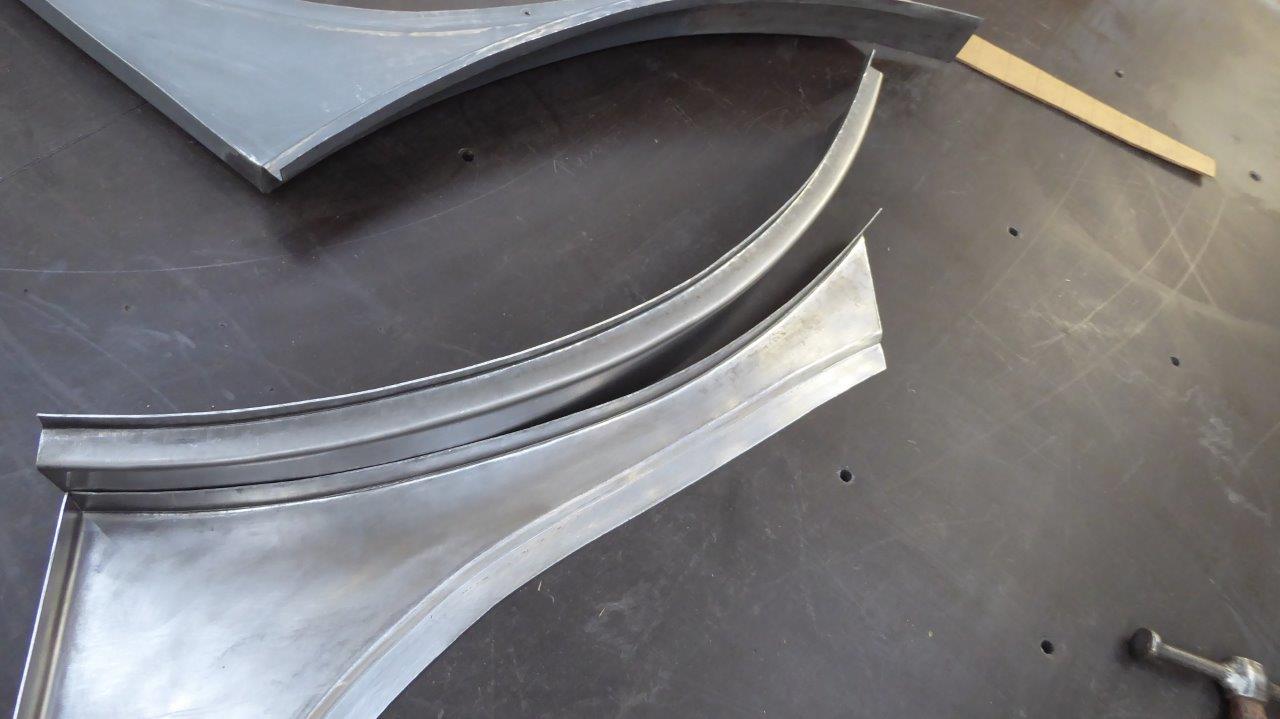
Now for the hard part! The wheel arch flange now has to be finished to take the Willys body skin. In the top right of my rough drawing, I show what it does stock with a 5mm-3/16" step in it before it meets the body outer bead profile. I want to remove that to create more area for a door seal to sit against as shown to the left of it. The red arrows point to where the new wheel arch flange currently sit at in development.
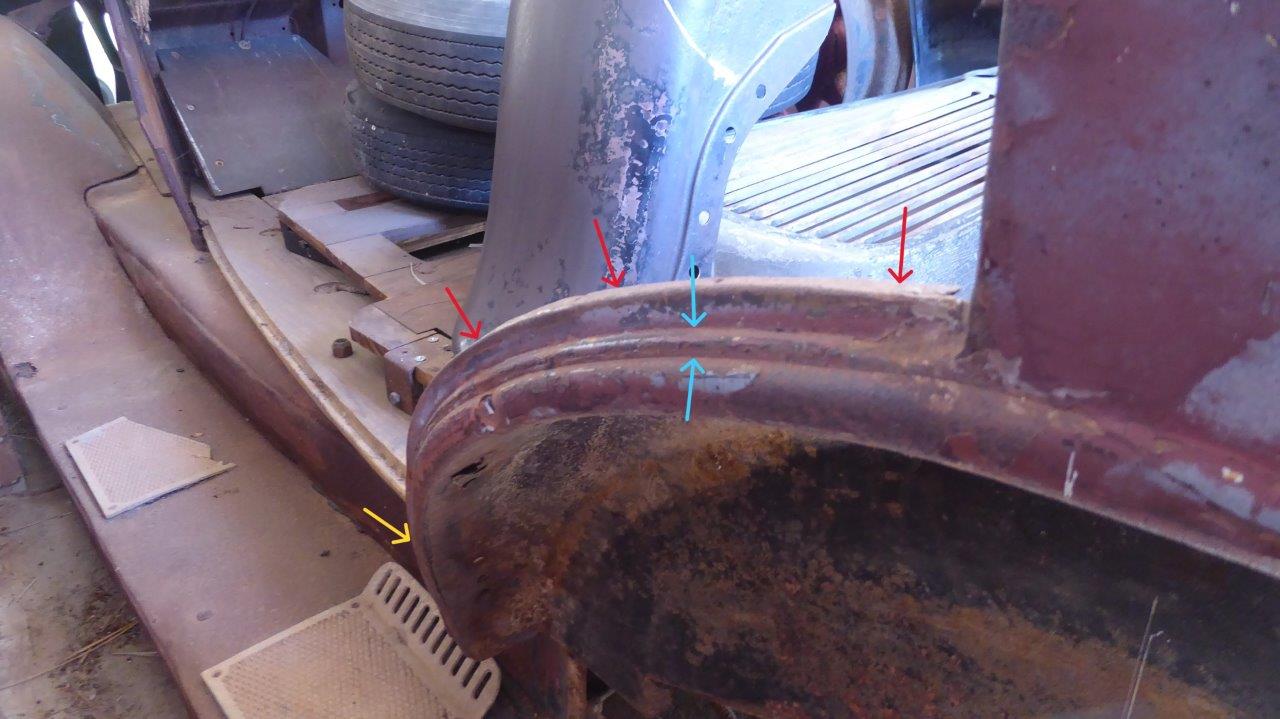
The red arrows are again showing where the new wheel arch flange is and between the blue arrows the step I want to remove. The yellow arrow shows just how complex the shape is as it bends inwards towards the door sill as well as arcing back following the body curve.
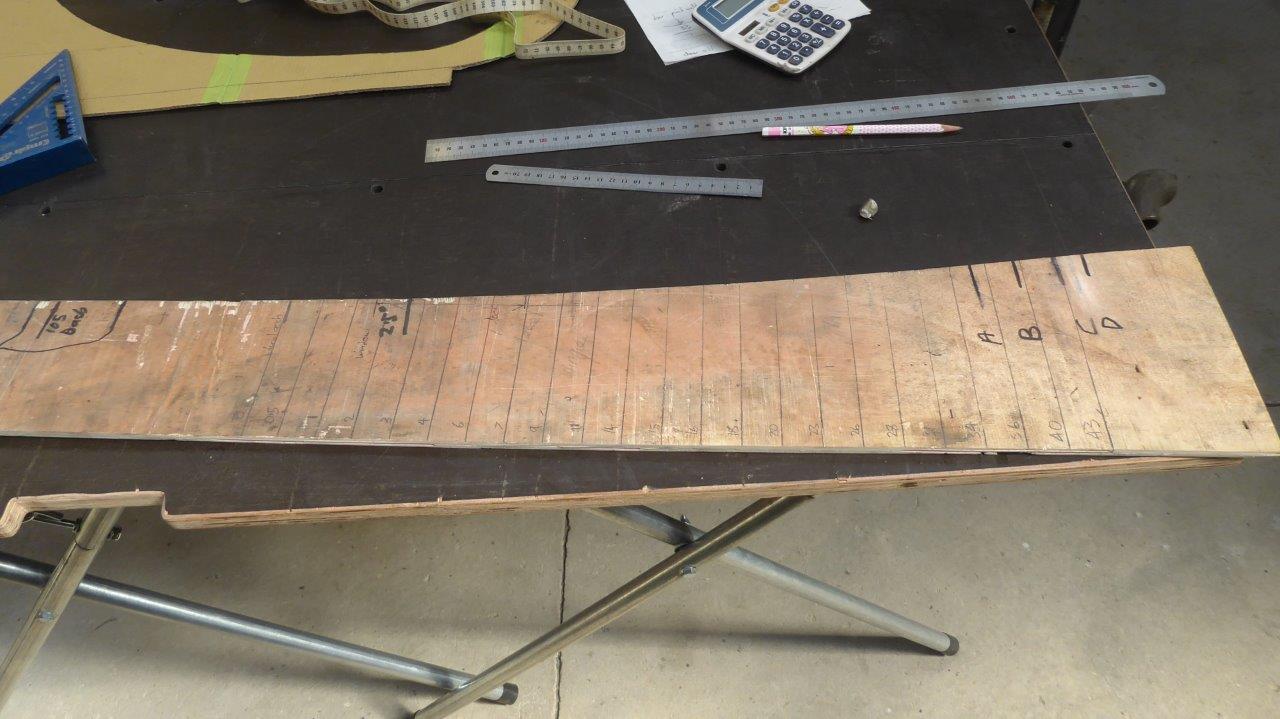
I wasn't quite sure how to make the outside wheel arch piece as I could not template off the original. Apart from its rough condition, I'm making it with a shallower curve both vertically and horizontally. There is more curve vertically so I thought I would start with that. What I did is divide the vertical height it has on the body template and then divide that same number over the longer distance the actual wheel arch is as it travels on the horizontal curve at the same time.

You can see how much longer it is than the lines drawn on the body template.
I folded up a piece long enough and will start shrinking the shorter side to follow the curve on the template.
First curve now completed but expect I will have to change it later to follow the horizontal curve.
Starting the make it follow the wheel arch shape. Being a tighter radius, I will be doing multiple passes at different depths. You are creating a wedge shape so will need more passes on the edge and less the deeper you move inwards with the shrinker. You know when more is needed deeper in as the surface will start to get shallow dips and rises. You might be able to see them in the section not yet done with the deeper shrinks.
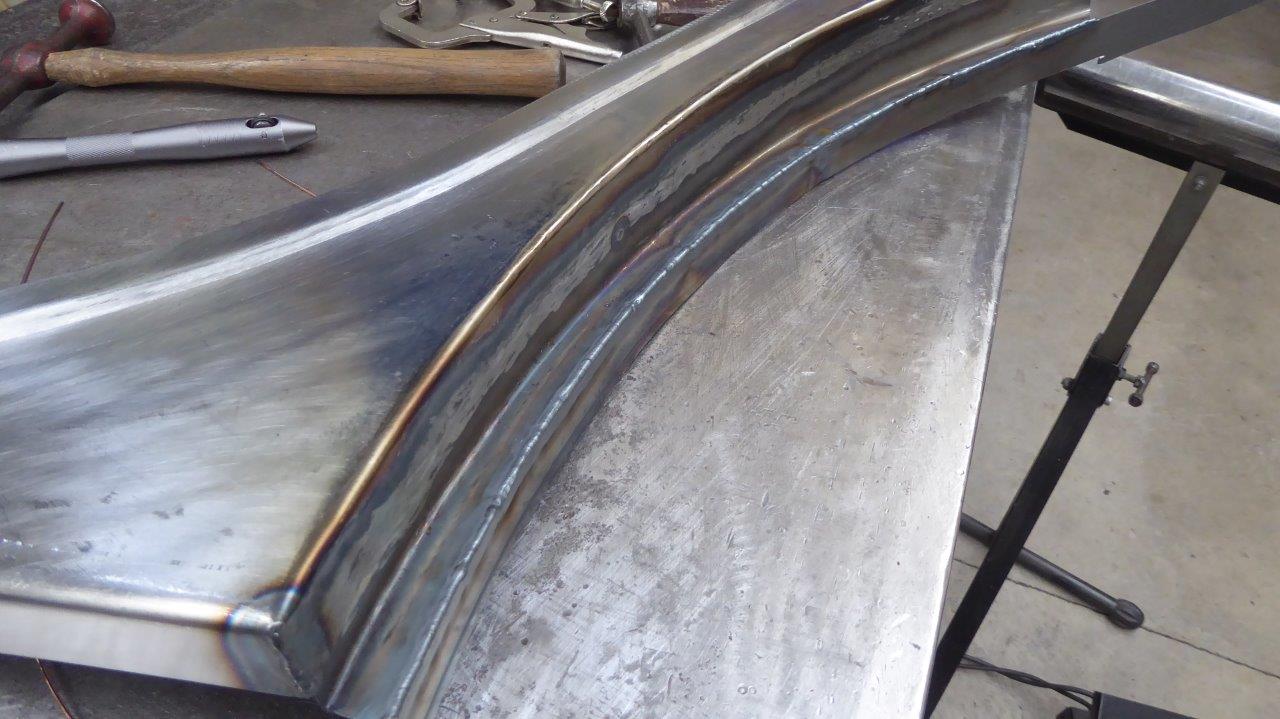
Once I had both curves I could hold it in place, and using both body templates, make the adjustments to suit the horizontal curve in the body. Then it was on to tipping the last edge hoping I would not lose shape in doing so.
Unfortunately it lost some shape. Part of the reason I think is a lot of the shrinking is now turned 90° and is not holding the tension in the remaining flange. More deeper stretches might help here. The other thing I think influences it is my steel on steel tipping dies stretching the fold as you are forcing it to tip.
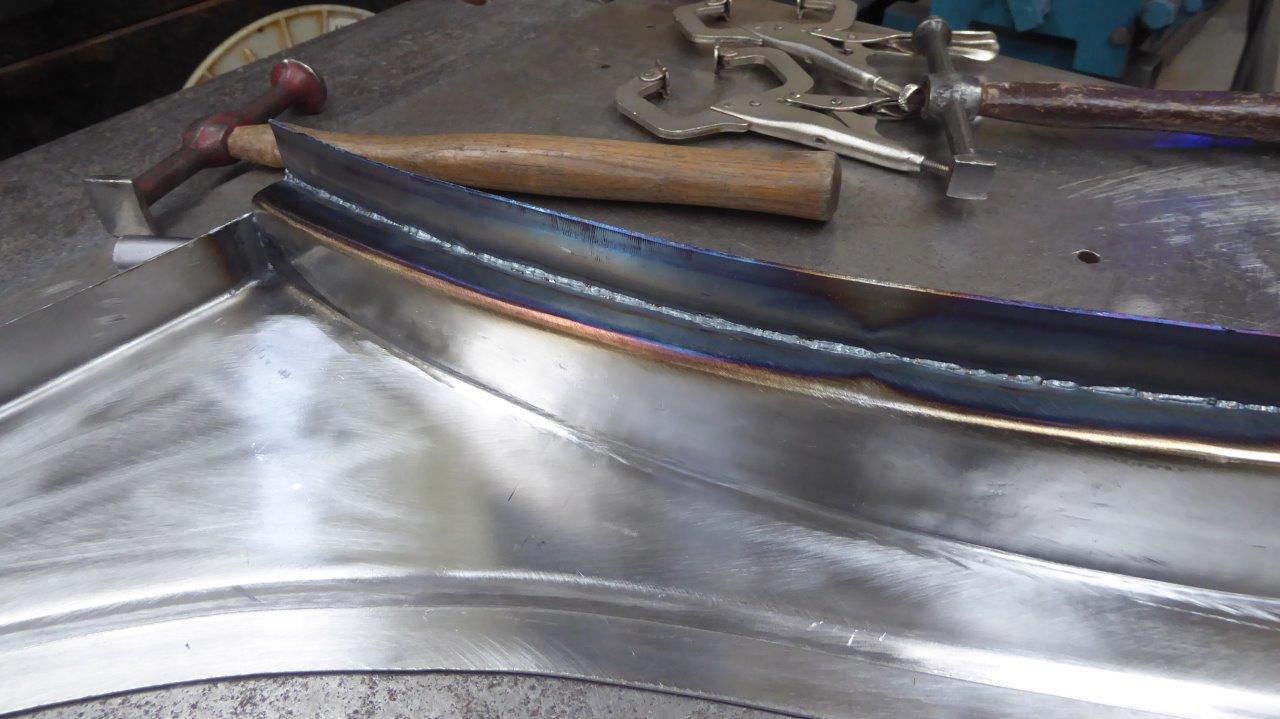
So to correct it I clamped the piece into the other wheel arch section already made, and then run the TIG as a heat source only. Less amps and faster moving than if you are welding. I left it to cool in position only using a little compressed air to sped it up.

Pleased to say it worked out well as you can see it follows the curve now in a relaxed state. I found it worked better doing the heat shrink while clamped as you are restricting the expansion while it is hot, and then pressure from the clamps then helps it conform to the other piece while in the cooling/shrinking phase.
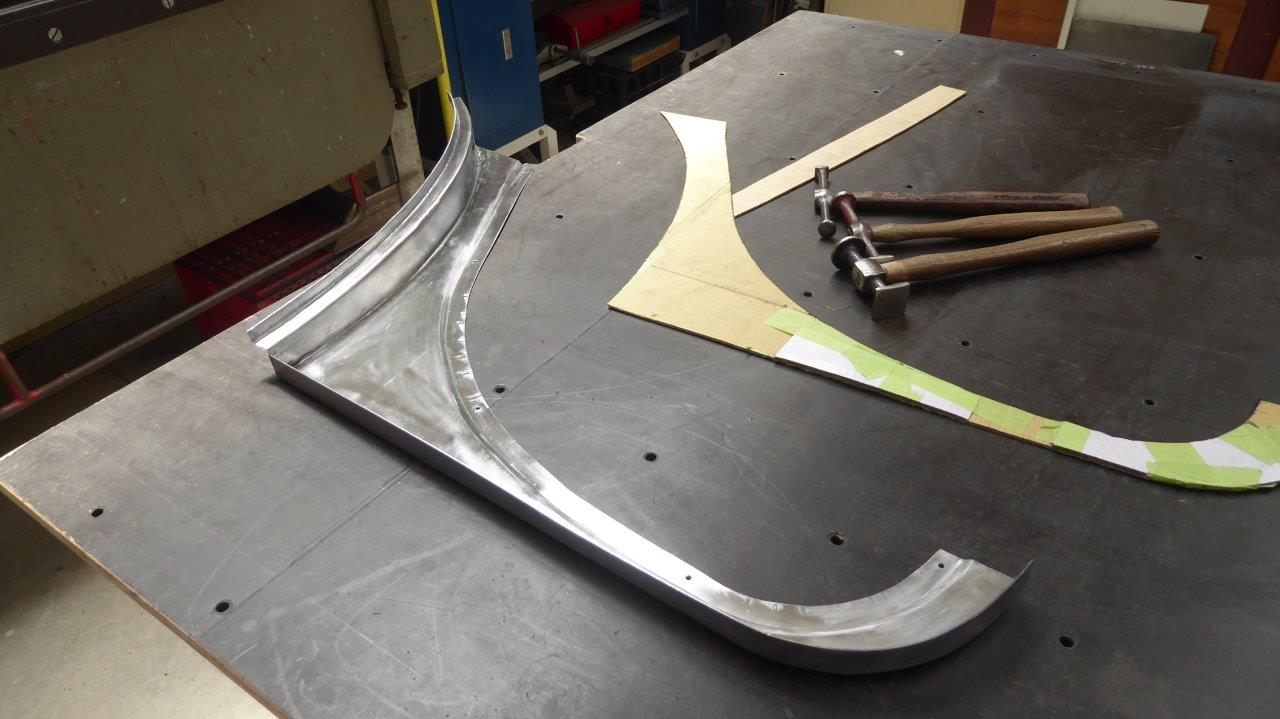
Now you can see it all in place. That final tipped edge on the outside will be welded the bead that goes around the wheel arch once the skin is fitted later on.
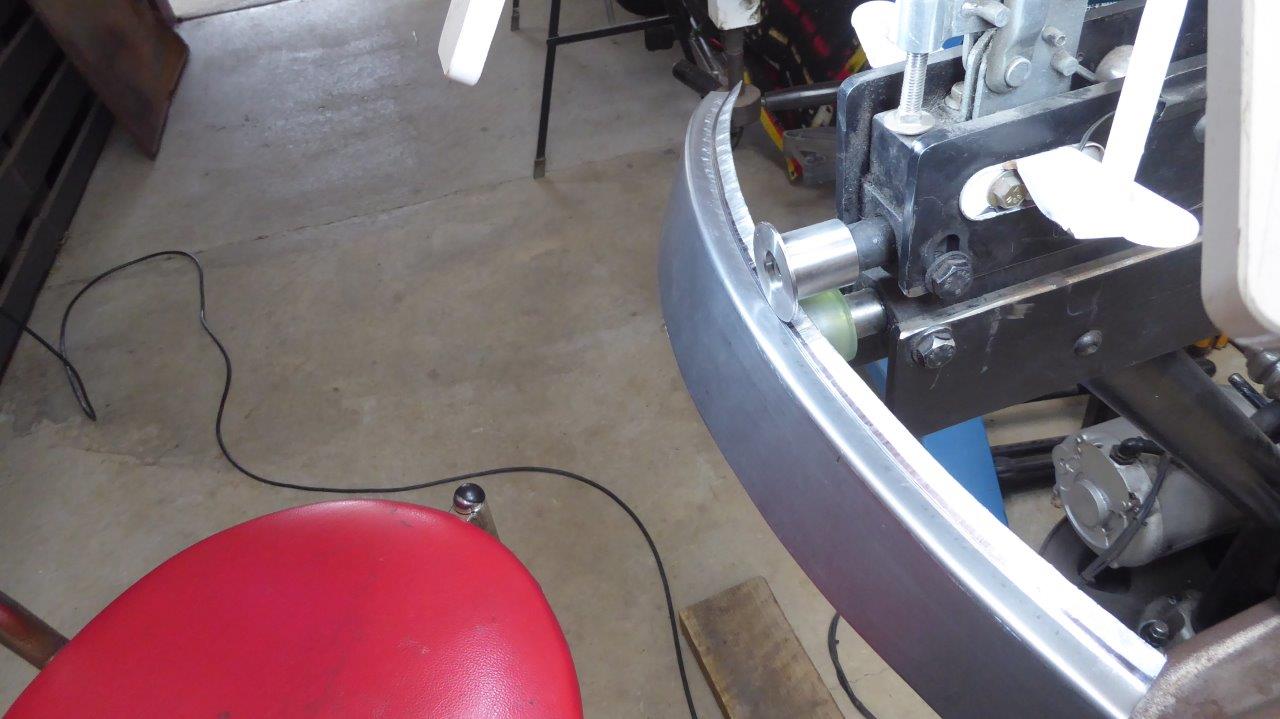
For the other side I purchased a new tipping wheel set off eBay. Same ones are listed on Amazon and AliExpress etc. For only $46 AUD, or $30 USD, it wasn't worth me making one and would have actually cost more in materials! This has a polyurethane soft lower die so should stop any stretching. What I also liked is the flat face to the upper die as now I can sit in front of it, and not only see better, but not be twisted up with my back like with the other one. I can also tip a full 90° with it.
Well now I have the opposite problem and ended up with too much curve! I had put in deeper shrinks, and also put a little more curve to start with, but some how it ended up even greater than that!
So I just cut off the tipped flange, stretched the edge back to the right shape and then welded on a wider than needed strip instead. The wider strip helps control the distortion while welding. I did an open corner weld and used the lay wire technique where you place the filler rod in the open corner and run over it with the TIG. I find I get better penetration than just fuse welding a closed outside corner.
This is the inside of that weld showing the amount of penetration. That will be rounded and smoothed to look like a folded corner with a grinder etc.
So the is the second side finished. I lot quicker and could use the same template exactly after turning it over.

So from one side of the lower B pillar we have the inner skin finished to the C pillar around the door opening. Other piece of the giant puzzle done.